2009/11/11 18:29:56
section を増やしてみました。
実行〜
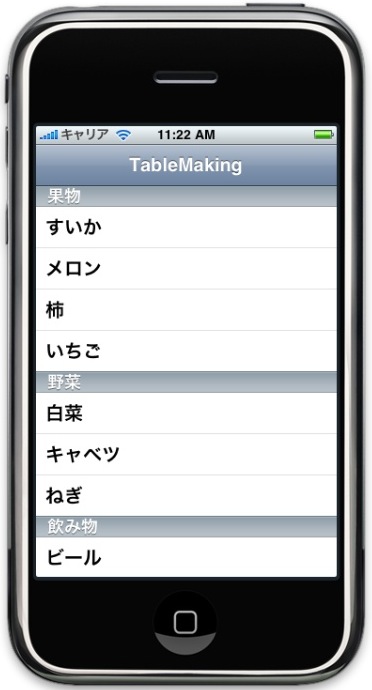
section の分類項目が入った〜(^^)v
section ごとのデータも入ってるね。
くだらないことだけど、思った通り動くと嬉しいね!
ここまで覚えると、とりあえずテーブルができるね。
| #pragma mark Table view methods // seciotn の数を 3 にします。 - (NSInteger)numberOfSectionsInTableView:(UITableView *)tableView { return 3; } // Customize the number of rows in the table view. // Table View の行の数をカスタマイズ と 各 section ごとのCell の数を設定。 - (NSInteger)tableView:(UITableView *)tableView numberOfRowsInSection:(NSInteger)section { switch( section ) { case 0: return 4; case 1: return 3; case 2: return 1; default: return 0; } } //デフォルトでは存在しないので、以下を丸ごと追加 //section のデータをセットしてます。 - (NSString *) tableView:(UITableView *) tableView titleForHeaderInSection:(NSInteger) section { switch( section ) { case 0: return @"果物"; case 1: return @"野菜"; case 2: return @"飲み物"; } return nil; } // Customize the appearance of table view cells. - (UITableViewCell *)tableView:(UITableView *)tableView cellForRowAtIndexPath:(NSIndexPath *)indexPath { static NSString *CellIdentifier = @"Cell"; UITableViewCell *cell = [tableView dequeueReusableCellWithIdentifier:CellIdentifier]; if (cell == nil) { cell = [[[UITableViewCell alloc] initWithStyle:UITableViewCellStyleDefault reuseIdentifier:CellIdentifier] autorelease]; } // Set up the cell... // section ごとの Cell の中身をセット。 if( indexPath.section == 0 ) { if( indexPath.row == 0 ) { cell.text = @"すいか"; }else if( indexPath.row == 1 ) { cell.text = @"メロン"; }else if( indexPath.row == 2 ) { cell.text = @"柿"; }else if( indexPath.row == 3 ) { cell.text = @"いちご"; } }else if( indexPath.section == 1 ) { if( indexPath.row == 0 ) { cell.text = @"白菜"; }else if( indexPath.row == 1 ) { cell.text = @"キャベツ"; }else if( indexPath.row == 2 ) { cell.text = @"ねぎ"; } } else cell.text = @"ビール"; return cell; } |
実行〜
section の分類項目が入った〜(^^)v
section ごとのデータも入ってるね。
くだらないことだけど、思った通り動くと嬉しいね!
ここまで覚えると、とりあえずテーブルができるね。
PR
2009/11/11 16:35:29
とりあえずデータを1個セットしてみる。
データを1個セットするにしても変更箇所が3カ所ある。
section の数、テーブルの Cell の数、実際にセットするデータ。
section の数: numberOfSectionsInTableView
Cell の数 : numberOfRowsInSection
データ : cell.text = @"にんじん";
cell.text = @"にんじん"; ←だけ追加してみた。
実行〜
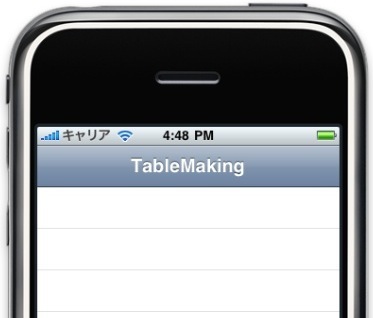
何も表示されず・・・f^^;
numberOfRowsInSection の数が 0 なので表示されず・・・
numberOfRowsInSection を 1 にしてみる。
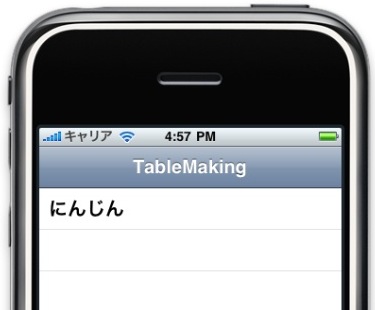
にんじんが表示された。
次は、section を表示してみる。
データを1個セットするにしても変更箇所が3カ所ある。
section の数、テーブルの Cell の数、実際にセットするデータ。
section の数: numberOfSectionsInTableView
Cell の数 : numberOfRowsInSection
データ : cell.text = @"にんじん";
cell.text = @"にんじん"; ←だけ追加してみた。
| #pragma mark Table view methods - (NSInteger)numberOfSectionsInTableView:(UITableView *)tableView { return 1; } // Customize the number of rows in the table view. - (NSInteger)tableView:(UITableView *)tableView numberOfRowsInSection:(NSInteger)section { return 0; } // Customize the appearance of table view cells. - (UITableViewCell *)tableView:(UITableView *)tableView cellForRowAtIndexPath:(NSIndexPath *)indexPath { static NSString *CellIdentifier = @"Cell"; UITableViewCell *cell = [tableView dequeueReusableCellWithIdentifier:CellIdentifier]; if (cell == nil) { cell = [[[UITableViewCell alloc] initWithStyle:UITableViewCellStyleDefault reuseIdentifier:CellIdentifier] autorelease]; } // Configure the cell. cell.text = @"にんじん"; return cell; } |
実行〜
何も表示されず・・・f^^;
numberOfRowsInSection の数が 0 なので表示されず・・・
numberOfRowsInSection を 1 にしてみる。
にんじんが表示された。
次は、section を表示してみる。
2009/11/11 14:52:46
タイトル名:TableMaking
タイトルの設定: self.title = @"TableMaking";
RootViewController.m にタイトル名を追加する。
#import "RootViewController.h"
@implementation RootViewController
- (void)viewDidLoad {
[super viewDidLoad];
// Uncomment the following line to display an Edit button in the navigation bar for this view controller.
// self.navigationItem.rightBarButtonItem = self.editButtonItem;
self.title = @"TableMaking";
}
保存して実行!
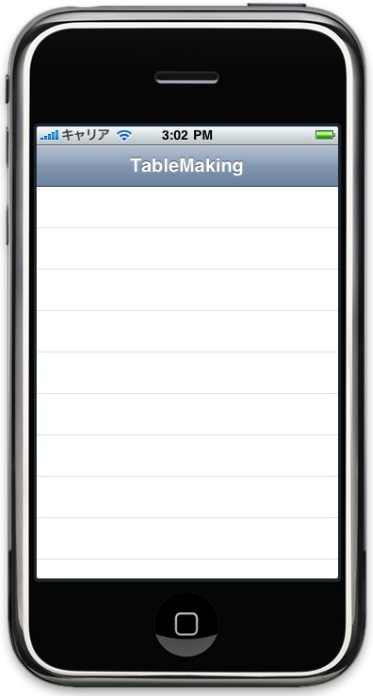
タイトルが表示された!(^^)v
次は実際にデータを入れてみよ〜っと!
タイトルの設定: self.title = @"TableMaking";
RootViewController.m にタイトル名を追加する。
#import "RootViewController.h"
@implementation RootViewController
- (void)viewDidLoad {
[super viewDidLoad];
// Uncomment the following line to display an Edit button in the navigation bar for this view controller.
// self.navigationItem.rightBarButtonItem = self.editButtonItem;
self.title = @"TableMaking";
}
保存して実行!
タイトルが表示された!(^^)v
次は実際にデータを入れてみよ〜っと!
2009/11/11 13:59:38
もとまかのiPhone・iPod touch戯れ日記
を参考にしながらテーブルを作ってみようと思います。基本的なテーブル作成から少しずつカスタマイズしていきたいと思います。
プロジェクト名は tableMaking
MainWindows.xib をクリックします。
Loaded From "RootViewContoroller"ってことなので RootViewContoroller をみてみます。
Table View がありました。
とりあえず実行してみます。
テーブルが表示されました。
とりあえずここまでってことで・・・
この後、テーブルに関するいろんな設定を組み込んでいきたいと思います。